


Unlocking Infinite Possibilities: A Deep Dive into Programmable NFTs on Solana


Degenerates of Solana Realm get ready to be swept off your feet by the extraordinary universe of programmable NFTs! Think of them as NFTs with a splash of magic, empowered with the ability to enforce royalties like virtual sheriffs.
The co-founder of Solana has spilled the beans, and the one and only Mark Cuban is peeking over the horizon, intrigued by the spectacle.
https://twitter.com/DegenerateNews/status/1692593113682874797
As we set foot on this path of innovation and curiosity, brace yourselves for a journey where NFTs redefine the rules and personalization reigns supreme.
Let's go!
1. What is Programmable NFT
So, you might be wondering, what's the big deal with these programmable NFTs compared to the plain ol' NFTs we know and love? Well, my friends, these NFTs are the renegades of the NFT world, letting creators set up all sorts of rules and restrictions. It's like NFTs with a boss-level makeover, giving you control and the possibility of making those sweet royalties rain. Whether you're an artsy genius, a code junkie, or just a curious cat exploring Solana's NFT playground, get ready to have your mind blown.
Here's the CliffsNotes Version of How This Madness Works:
Rule Sets and Custom Swagger: With programmable NFTs, creators can throw in these things called "rule sets" that they can tinker with like mad scientists. This rule sets lay down the law, dictating what the NFT can and can't do. Imagine setting up a rule that only lets NFTs party with certain programs when transferring.
Token Metadata Program: Instead of relying on the same old program everyone's using, you're sending your NFT instructions to the Token Metadata Program. This program then checks those instructions against the rule sets you've cooked up, making sure your NFT plays by your rules. It's like having your own bouncer at the NFT club, making sure only the cool kids get in.
Royalty Time, Baby: Hold onto your hats because here comes the good stuff. Programmable NFTs are like the superheroes of the NFT world—they can enforce royalties! You can go all in with an "allow-list" or "deny-list" approach. With the allow-list, only certain programs get to touch your NFTs, keeping the riff-raff away. On the flip side, the deny-list approach blocks certain programs from messing with your precious creations. It's like a NFT fortress of awesomeness, protecting your creations and possibly making you that sweet, sweet moolah.
Metaplex Foundation Rule Set: Now, for those who want to ride the royalty train without going full DIY mode, the Metaplex Foundation's got your back. They've whipped up an optional rule set that's like a VIP guest list for royalties. It's updated regularly and includes programs that make it rain for creators. Easy-peasy royalty enforcement without all the hassle. But hey, if you're the wild and free type, you can always craft your own custom rules for your programmable NFTs.
Crazy Cool Scenarios You Need to Know:
Artistic Riches: Imagine you're an artist who wants a piece of the action every time your artwork changes hands. Well, with programmable NFTs, you can set up rules that only let approved platforms handle your NFT sales. Cha-ching, royalties flowing in like a waterfall!
Exclusive Digital Swag: Brands and creators can unleash limited edition programmable NFTs with transfer rules that are tighter than a pair of skinny jeans. Want your NFTs to only party with a select squad of collectors? Done. Or maybe you want them to hit the dance floor only during specific time windows. Exclusive and elusive, just like your high school crush.
Game On, NFT Style: Get ready for the ultimate power-up in the gaming world. Programmable NFTs can grant special superpowers to players. Picture this: a rare sword in a game that's actually a programmable NFT. The sword only lets its owner go to certain levels or battle certain foes. It's like being the chosen one in your very own video game adventure.

Let’s get a little technical.
If you already are aware of what NFTs are in Solana then it would not be hard to understand Programmable Nfts, as they are also created as a SPL TOKEN with fantastic images however they have a particular set of Rules tangled on them compared to a Normal NFT. Let us understand it with a Diagram.
As you can see in the Diagram above, if you have created an NFT in the past you might be aware of Master Edition Account, Mint Account, an Associated Token Account, and MetaData Account. However, with PNFT, there has been an introduction to a couple of new accounts such as the Ruleset Account and Token Record Account. Let us understand what they are.
The Rule Set Account is a PDA Account, that is created by the seeds’
Creator
Rule Set Name
This account is created by the program called Token Auth Program.
Token Record Account:- Token Record accounts are used by Programmable NFTs only. Since Programmable NFTs add another layer on top of tokens, Token Record accounts enable us to attach custom data to token accounts rather than mint accounts.
They are also a PDA Account created using seed:-
Metadata
Token Metadata Program
Mint
Token Record Prefix
Token
2. Guide to create your first Programmable NFT.
Let’s get Started with Minting our first Programmable NFT:-
On your Terminal or CMD, type the following command.
Step 1:-
mkdir pnft
cd pnft
Now that we have created the folder where we will write our Code in the pnft directory.
Create a file inside the Directory we created in Step 1
Step 2:-
(Mac & Linux)
echo > app.ts(Windows)
On Windows it will ask you to enter each line on the terminal just like the below image, Do not type anything and just press
ENTER

Step 3:-
Now, we have to initialize the project and make sure to have NPM or Yarn installed.
If not follow this guide NPM INSTALL
yarn init --yes
    OR
npm init --yes
Step 4:-
Now we will install Solana CLI
This will help us to create our wallet as well as configure our Network.
(Mac & Linux)
sh -c "$(curl -sSfL https://release.solana.com/v1.16.8/install)"The following message indicates it is successfully installed
downloading v1.16.8 installer
Configuration: /home/solana/.config/solana/install/config.yml
Active release directory: /home/solana/.local/share/solana/install/active_release
* Release version: v1.16.8
* Release URL: https://github.com/solana-labs/solana/releases/download/v1.16.8/solana-release-x86_64-unknown-linux-gnu.tar.bz2
Update successful
To verify type the below command and it should showcase v1.16.8 as the version.
solana --version(Windows)
Copy and Paste the below command in the CMD:-
cmd /c "curl https://release.solana.com/v1.16.8/solana-install-init-x86_64-pc-windows-msvc.exe --output C:\solana-install-tmp\solana-install-init.exe --create-dirs"Your cmd should display the below instance

After that press enter and paste the below command:-
C:\solana-install-tmp\solana-install-init.exe v1.16.8Following the last command, that would display the version of Solana CLI
solana --version 
Step 5:-
Let’s create a paper wallet (Do not send any money to this wallet, any loses occurred will be in your own hands).Run on Command Line
solana-keygen new --no-outfileThe above command should create the wallet at the location ~/.config/solana/id.json
In order to check if the wallet is created type Run on Command Line
solana config get It should output a set of details, for now, we only require it if our wallet has been created. We can carefully check the Keypair path option to see the location our wallet was created.

Now let us change the network from Mainnet(Real Money is used ) to Devnet(Fake money) using the below command in the Command Line.
solana config set --url https://api.devnet.solana.comOnce changed we will airdrop some fake Solana native tokens
solana airdrop 2 Here 2 is the number of tokens we will receive.
Step 6:-
Create a tsconfig.json with .json importing enabled:
(Mac & Linux)
tsc -init --resolveJsonModule true --target es2020(Windows)
tsc.cmd -init --resolveJsonModule true --target es2020Step 7:-
Install the required Dependency and add the below code in the command line.
yarn add @solana/web3.js @metaplex-foundation/js fs
#or
npm install @solana/web3.js @metaplex-foundation/js fs
Step 8:-
Now in the app.ts file, import these modules into the top of the file.
import { Connection, Keypair, PublicKey } from "@solana/web3.js";
import { Metaplex, keypairIdentity, bundlrStorage, toMetaplexFile, toBigNumber } from "@metaplex-foundation/js";
import { TokenStandard } from '@metaplex-foundation/mpl-token-metadata';
import fs from 'fs';
Step 9:-
Now in the next line after the imports we will connect to the Solana Devnet Cluster.
const devnetURL  = "https://api.devnet.solana.com"
//Connecting to the Solana Cluster
const Solana_Connection = new Connection(devnetURL)
Finally, we will use the paper wallet we created in Step 5
const payerFile = "Add your paper Wallet Location"; // Add your paper wallet location
const payer = JSON.parse(fs.readFileSync(payerFile, "utf-8"));
const keypair = Keypair.fromSecretKey(new Uint8Array(payer));
If you're unable to find the paper wallet location use
solana config get 
The above command will give the location stated as Config File copy the path and paste it by removing the statement “Add your paper wallet location” (make sure to paste it inside the double quotes)
Step 10:-
Now Establish an Instance of Metaplex
const METAPLEX = Metaplex.make(Solana_Connection).use(keypairIdentity(keypair)).use(bundlrStorage({address: 'https://devnet.bundlr.network',
providerUrl: devnetURL,
timeout: 60000,}))
Step 11:-
Create an NFT config, We will use an already-updated metadata URI for this guide:
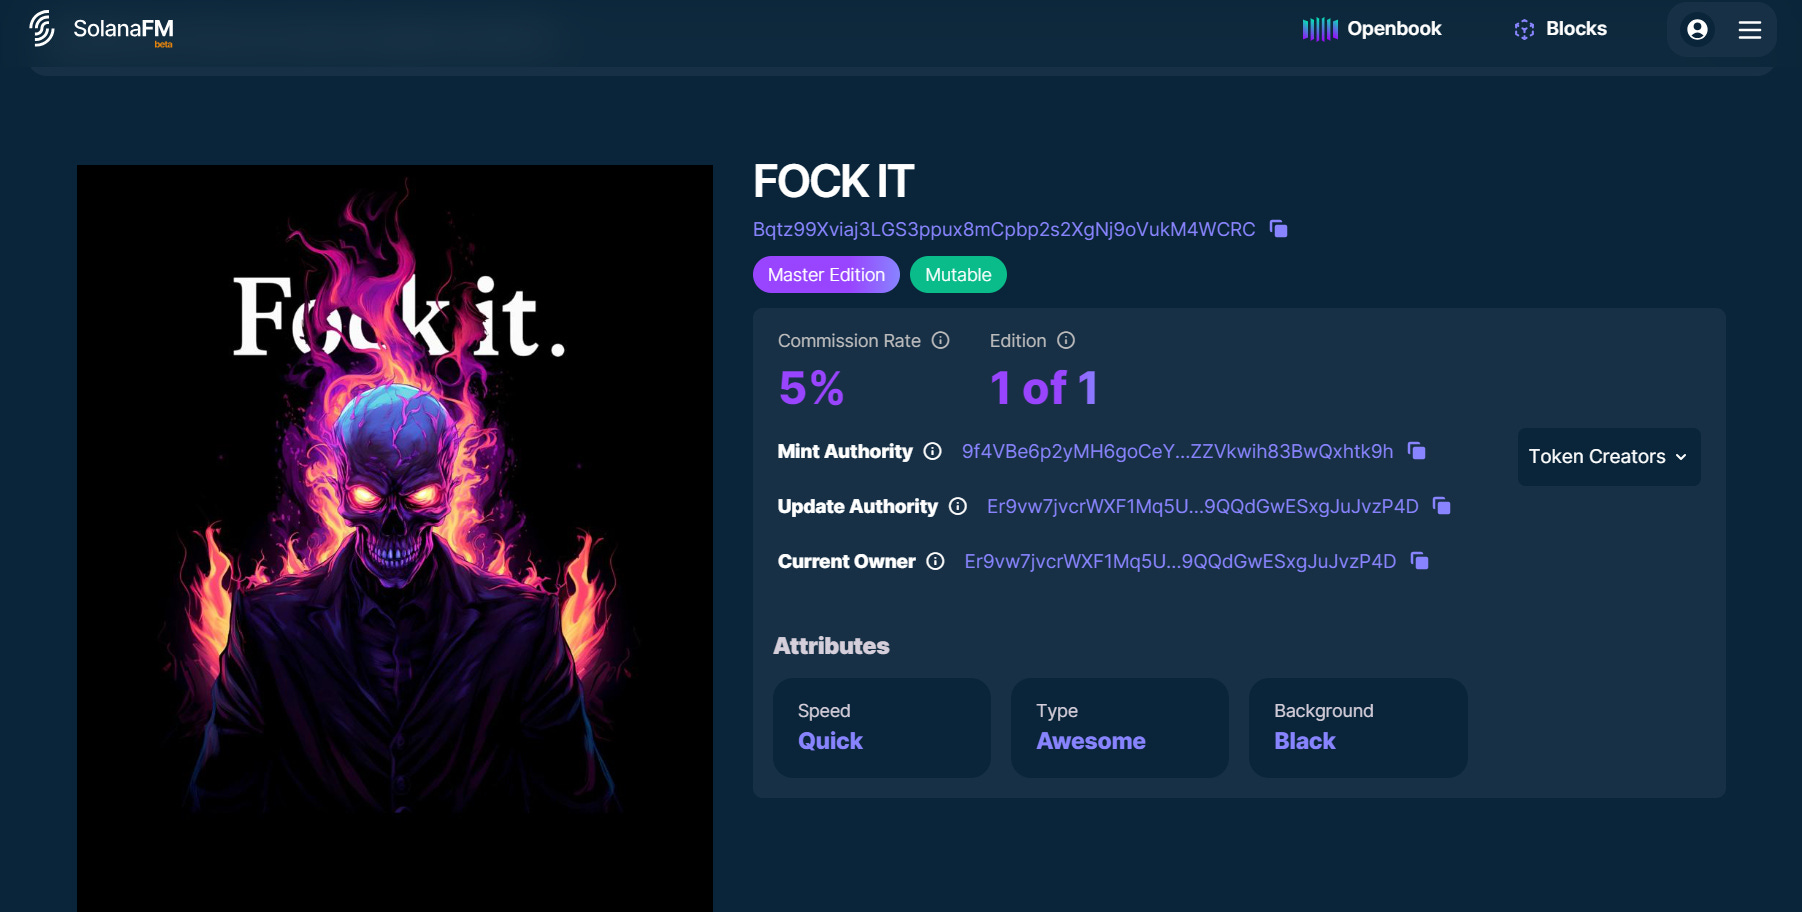
https://arweave.net/zBGYJjGlZND6uJTA1NewDbqcPveSBvBET-lw3KqLC5o
const CONFIG = {
    imgName: 'FOCK IT',
    symbol: 'FO$IT',
    sellerFeeBasisPoints: 500,//500 bp = 5%
    creators: [
        { address: keypair.publicKey, share: 100 },
    ],
    metadata: 'https://arweave.net/zBGYJjGlZND6uJTA1NewDbqcPveSBvBET-lw3KqLC5o'
};
Even though we are using already-existing metadata, we still need to supply some information about our NFT that will be stored on-chain. Specifically, we need to define our name, symbol, and royalties.
Step 12:-
Let's create our mint function. We will pass in the elements of our CONFIG object. Create a new function, mintProgrammableNft:
async function mintProgrammableNft(
    metadataUri: string,
    name: string,
    sellerFee: number,
    symbol: string,
    creators: { address: PublicKey, share: number }[]
) {
    console.log(`Minting pNFT`);
    try {

    }
    catch (err) {
        console.log(err);
    }
}
Though you can use Metaplex's prebuilt mint function, we will use their builders tools to create a TransactionInstruction. This will give us more flexibility in sending calls to the network. The main difference between minting a "Standard" NFT versus a programmable one is adding tokenStandard: TokenStandard.ProgrammableNonFungible to our mint parameters.
Inside your try the statement, add:
const transactionBuilder = await METAPLEX
            .nfts()
            .builders()
            .create({
                uri: metadataUri,
                name: name,
                sellerFeeBasisPoints: sellerFee,
                symbol: symbol,
                creators: creators,
                isMutable: true,
                isCollection: false,
                tokenStandard: TokenStandard.ProgrammableNonFungible,
                ruleSet: null
            });
You may notice if you have written the code for Normal NFT that there is an additional field called RuleSet, this is what makes, this is what defines this as a Programmable NFT.
The null will define metaplex-based rule sets such as the enforced royalties. However, you may check this GitHub with an additional Rule Set:- RULE-SET .
Step 13:-
In this step, we will send our transaction to the cluster calling Metaplex's rpc().sendAndConfirmTransaction() method and verifying a successful transaction. After your .create() call, add the following code:
Call this function outside of mintProgrammableNFT Function.
let { signature, confirmResponse } = await METAPLEX.rpc().sendAndConfirmTransaction(transactionBuilder);
        if (confirmResponse.value.err) {
            throw new Error('failed to confirm transaction');
        }
        const { mintAddress } = transactionBuilder.getContext();
        console.log(`   Success!🎉`);
        console.log(`   Minted MEME NFT: https://explorer.solana.com/address/${mintAddress.toString()}?cluster=devnet`);
        console.log(`   Tx: https://explorer.solana.com/tx/${signature}?cluster=devnet`);
You will notice here that we can use the transaction builder's getContext() method to fetch the mint address of our NFT. We use it to generate a URL to the NFT on Solana Explorer.
Step 14:-
Mint your NFT:-
Finally, we are ready to mint our NFT. Inside, app.tscall your function by passing in our CONFIG elements:
mintProgrammableNft(
    CONFIG.metadata,
    CONFIG.imgName,
    CONFIG.sellerFeeBasisPoints,
    CONFIG.symbol,
    CONFIG.creators
);
And in your console, enter the following:
(MAC & LINUX)
ts-node app(Windows)
ts-node.cmd .\app.ts This is the output you should receive

Congratulations you have Mintd your First Programmable NFT.
Open the First Link to check your NFT.
3. Different Use Cases of Programmable NFT.
Artist Royalties: Imagine an artist who wants to ensure that they receive a percentage of every resale of their artwork. By using programmable NFTs, they can set up a rule set that only allows approved platforms or marketplaces to handle the reselling of their NFTs. This way, they can automatically receive royalties whenever their art is sold.
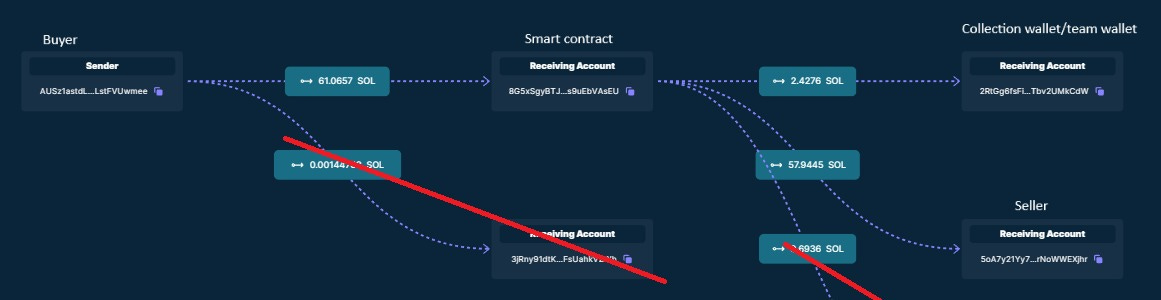
Madlads Roaylties the team wallet is the one getting the enforced SOL
Limited Edition Collectibles: Brands or creators can release limited edition programmable NFTs with specific transfer restrictions. For example, they can create NFTs that can only be transferred between a closed group of collectors or within a specific time frame. This adds exclusivity and scarcity to the collectibles, making them even more valuable.
Gaming Items with Usage Rights: Programmable NFTs can be used in gaming environments to grant specific usage rights to players. For instance, a rare sword in a game could be a programmable NFT that only allows the owner to use it at certain levels or against specific opponents, creating a unique gaming experience. It can also be programmed to level up swords, armor, and any in-built game feature, that would help you fight your boss 😊.

Programmable NFTs are poised to revolutionize the NFT landscape on Solana by offering enhanced functionality, customization, and the potential for royalty enforcement. As a creator, protocol developer, or user, understanding and leveraging this new asset class can unlock exciting possibilities and empower you to make the most of the evolving NFT ecosystem.
4. Comparing Different NFT Formats In Solana
The below image provides an extensive distinction between the different standards and gives a clear picture of the use case helping the Creators, Developers, and anyone following the guide to choose the Standard.

Conclusion
As we've ventured through the nooks and crannies of this module, it's clear that programmable NFTs are the trailblazers of the NFT universe. As we've ventured through the nooks and crannies of this module, it's clear that programmable NFTs are the trailblazers of the NFT universe.
Programmable NFTs aren't just changing the game; they're rewriting the rulebook. The Solana NFT landscape is on the brink of transformation, as programmable NFTs offer enhanced features, customization options, and the promise of royalty enforcement. As a creator, protocol developer, or user, this newfound understanding of programmable NFTs can open doors to an exciting realm of opportunities within the ever-evolving NFT ecosystem.
And while there might not be a one-size-fits-all approach to Substack, the journey into programmable NFTs echoes this sentiment. Innovation thrives when experimentation meets curiosity, and as you traverse this landscape, remember that it's your playground. Embrace the freedom to create, explore, and have fun – because when you're having a blast, your readers are sure to follow suit.
Thank you for accompanying me on this journey through the intriguing world of programmable NFTs. If you're hungry for more insights, don't hesitate to subscribe for more thrilling content. Let's keep pushing boundaries and exploring the endless frontiers of digital creativity together.
 | A guest post by
|